Getting Started
Sign Up for Remotle
This guide is for the person setting Remotle up for their organisation for the first time.
Every new organisation starts with a 14-day trial with every feature for one user. After the trial the organisation moves to the Free plan unless you choose a plan.
Create your organisation
Section titled “Create your organisation”-
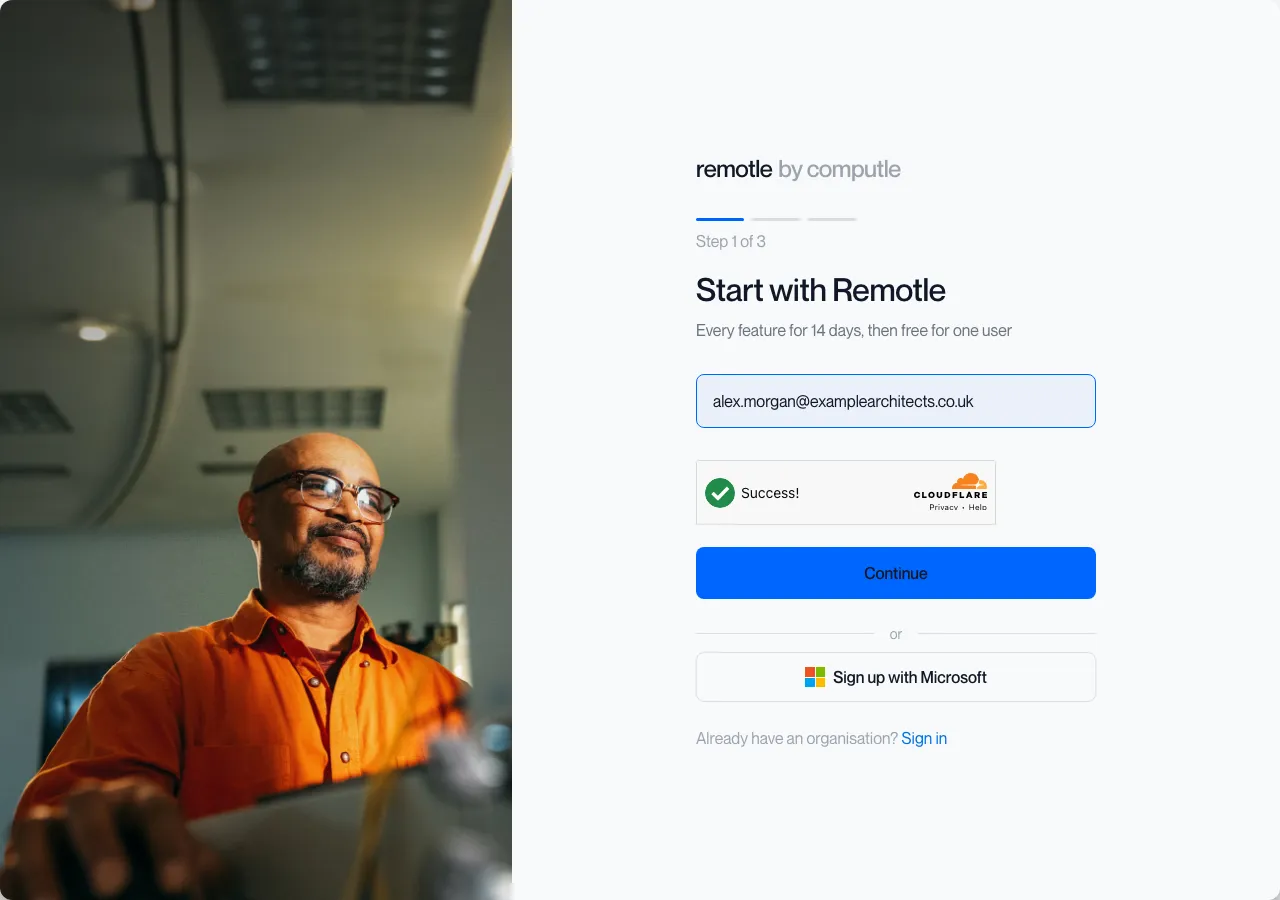
Go to
https://portal.remotle.comand enter your work email.Click Continue, or click Sign up with Microsoft to use your Microsoft work account.
-
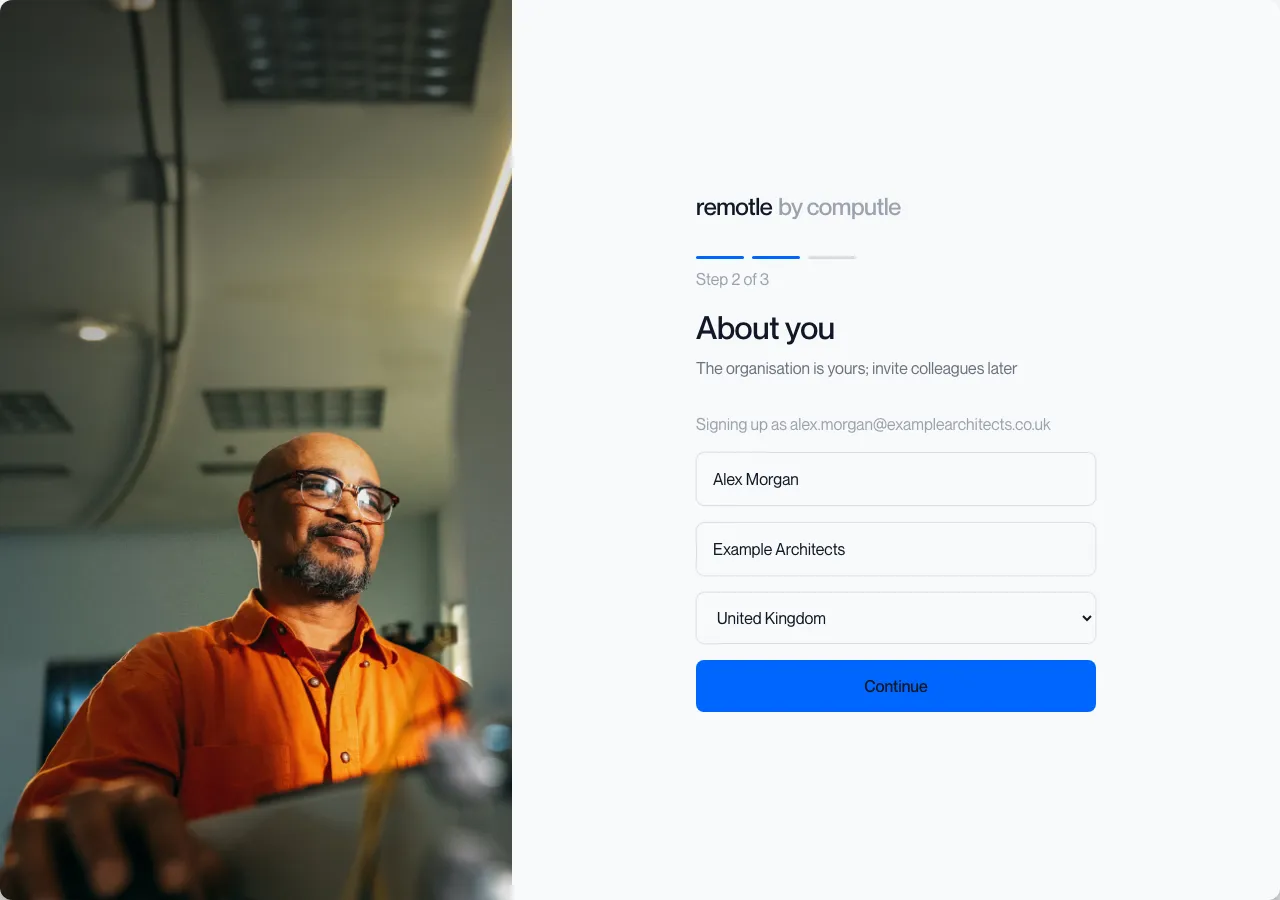
Enter your name, your organisation’s name and your country, then click Continue.
You are the owner of the organisation. You invite colleagues later.
-
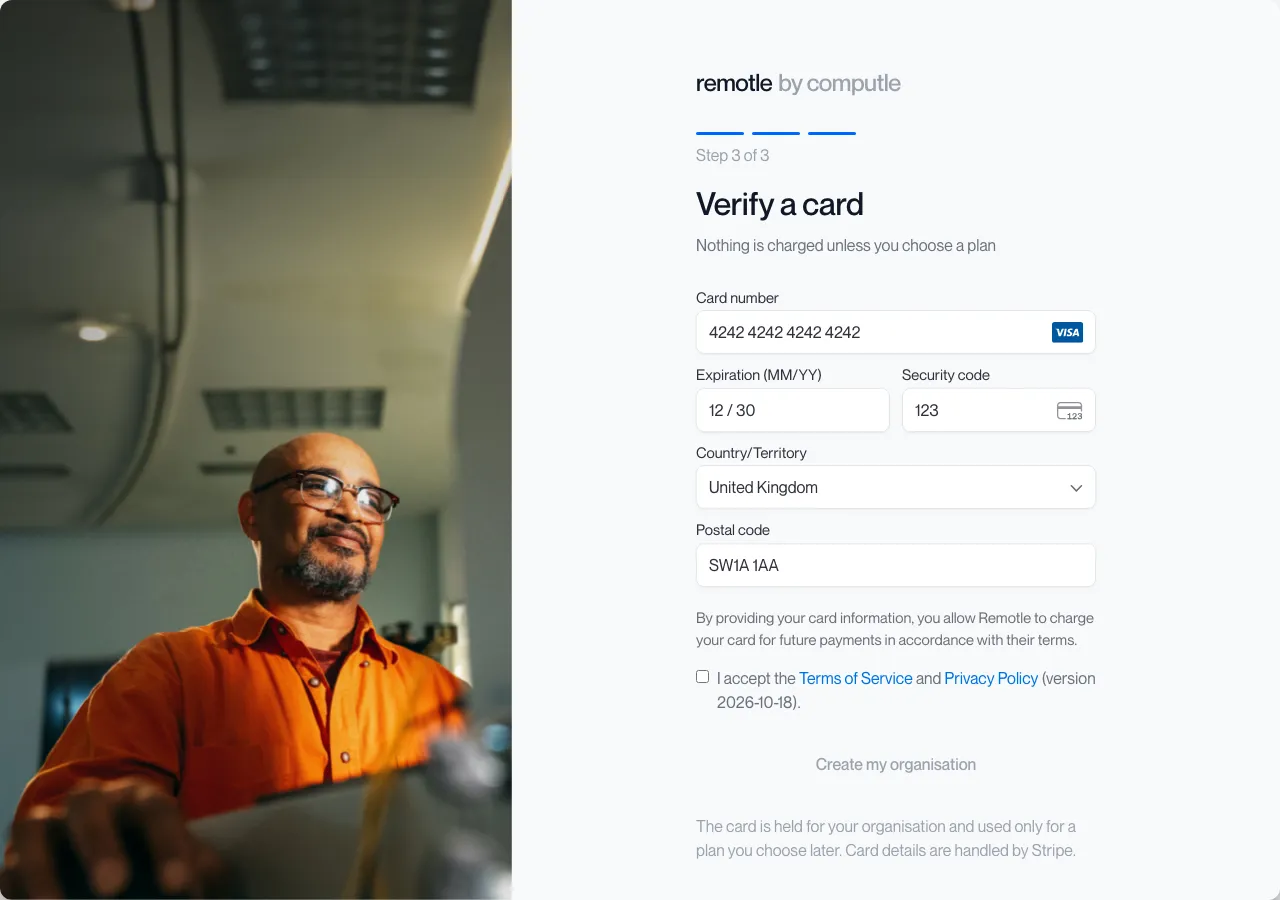
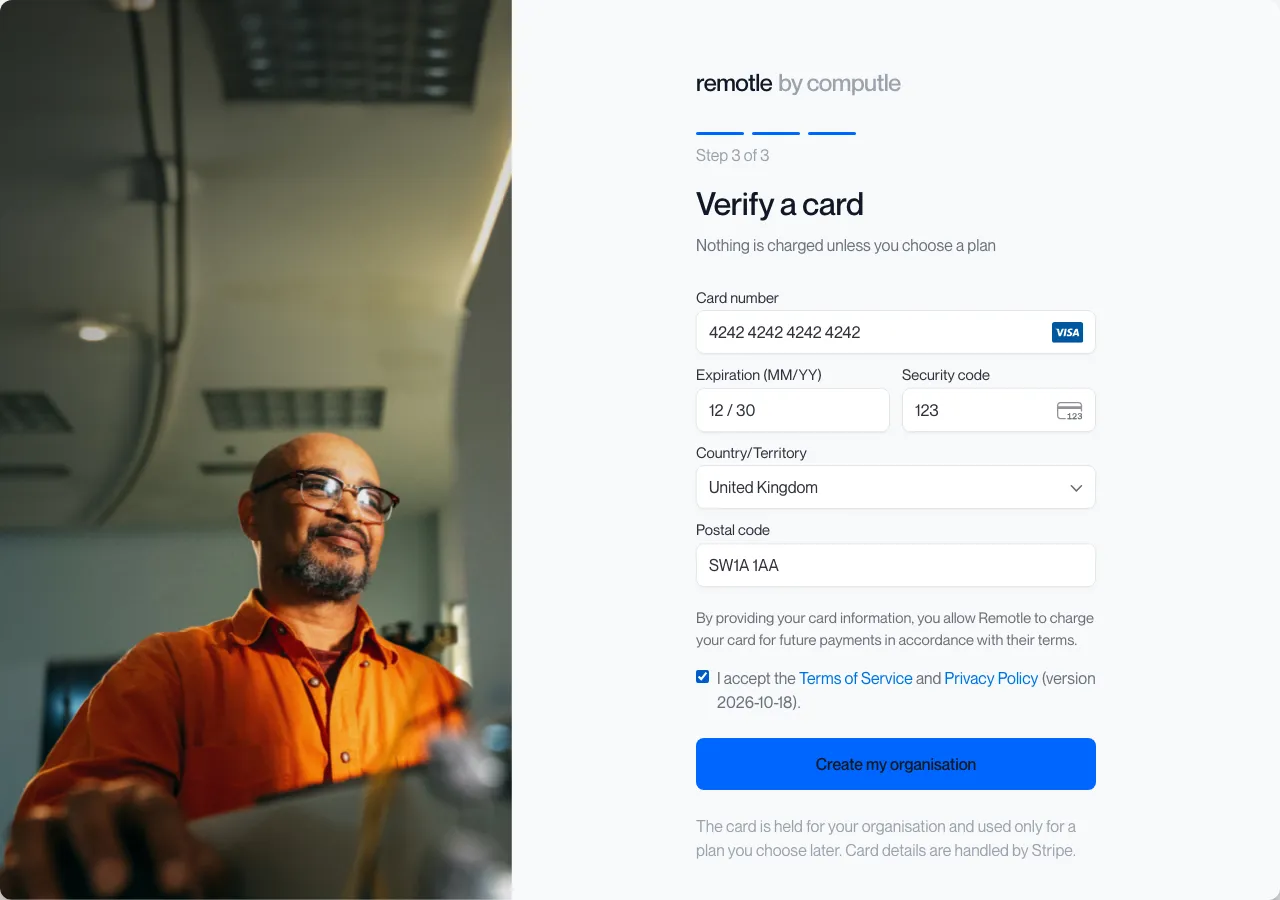
Enter a payment card to verify it.
Nothing is charged unless you choose a plan. Card details are handled by Stripe.
If the card is refused, the page says
This card can't be used for another free organisation. Use a different card, or choose a paid plan.You stay on this step. Enter a different card, or choose a paid plan in the Plan choice that appears. -
Tick the box to accept the Terms of Service and Privacy Policy, then click Create my organisation.
The terms are at remotle.com/terms and the privacy policy at remotle.com/privacy.
-
Open the email Remotle sends you and click the link to confirm your address.
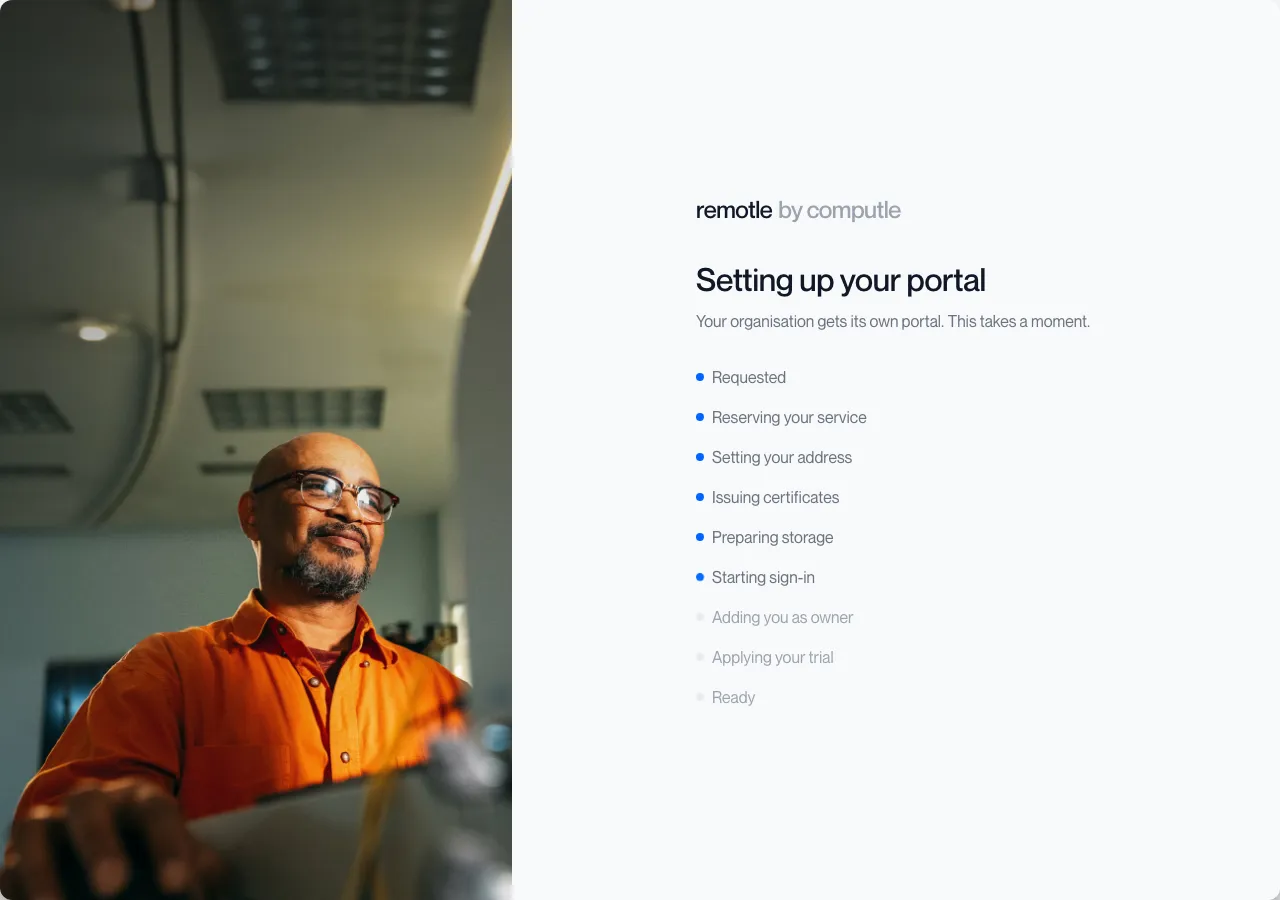
Your organisation gets its own portal. The page lists each step as it is set up.
-
When the page says Your portal is ready, sign in.
Your portal has its own address,
<your org>.id.remotle.com. Bookmark it.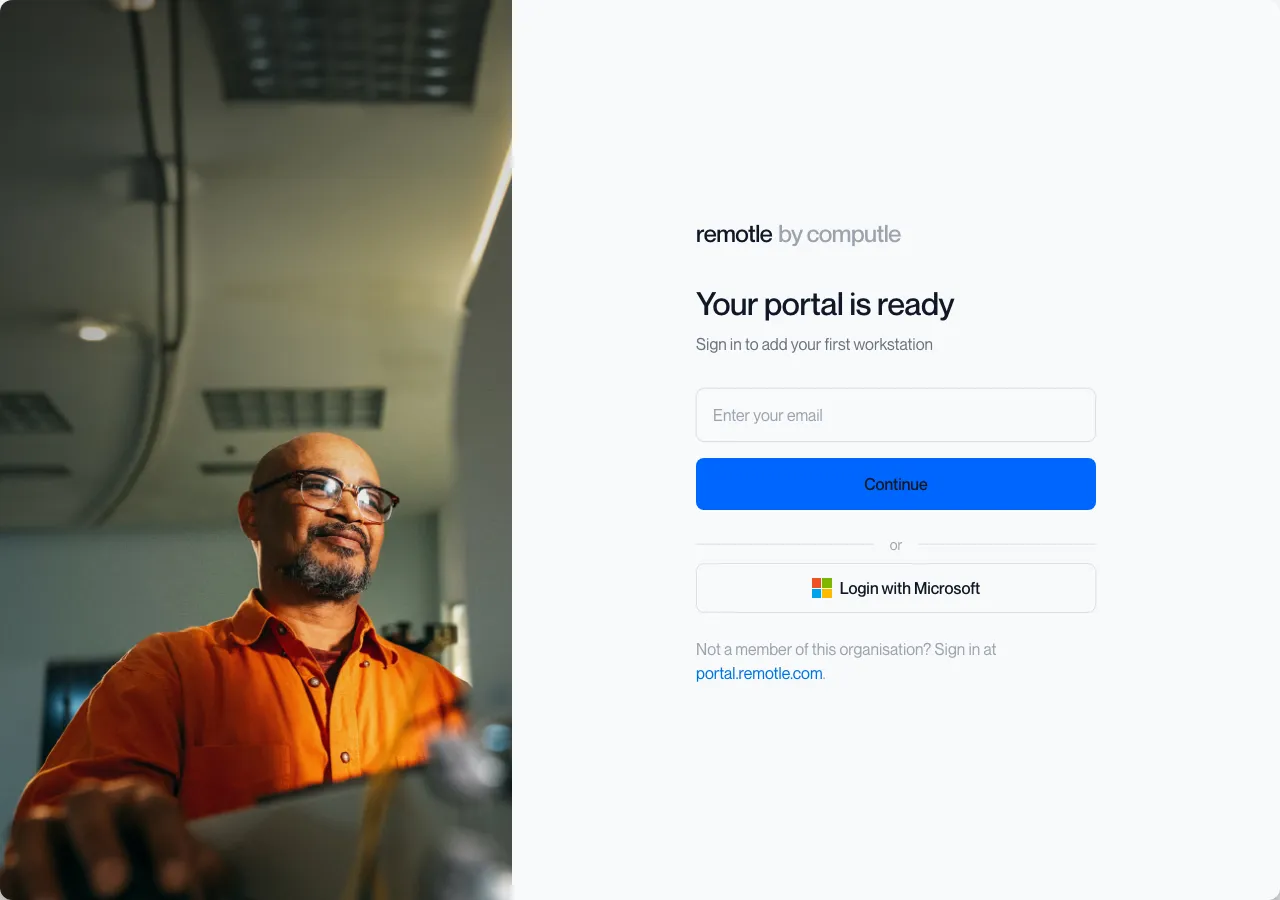
Sign in to your portal
Section titled “Sign in to your portal”You can sign in at your portal’s address, or at https://portal.remotle.com, which finds your organisation from your account.
-
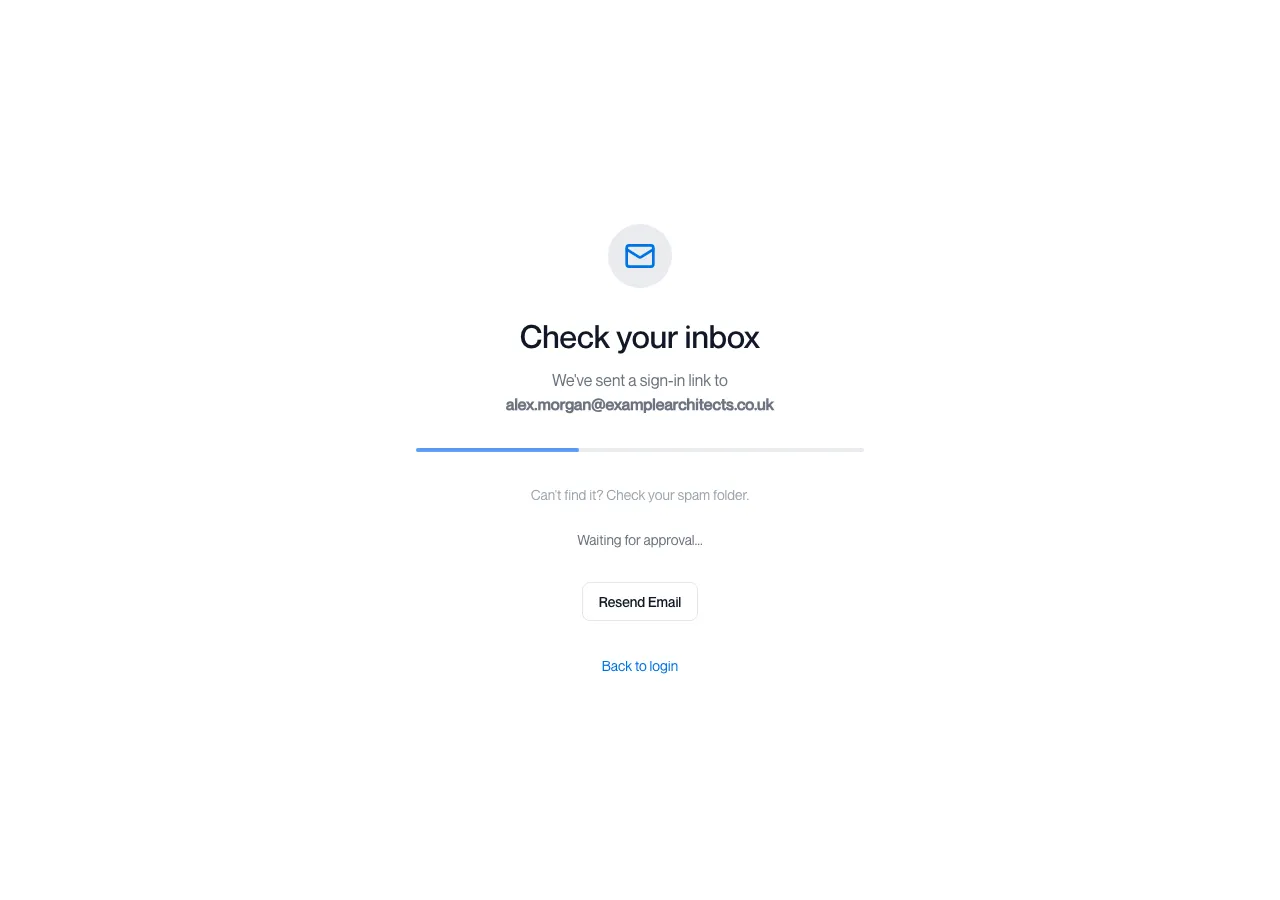
Enter your email and click Continue, or click Login with Microsoft.
With Microsoft, sign in with your work account and the portal opens. With email, Remotle sends you a sign-in link.
-
Open the email and click the sign-in link.
The link works once and expires after a short while. If the email is not there, check your junk folder.
-
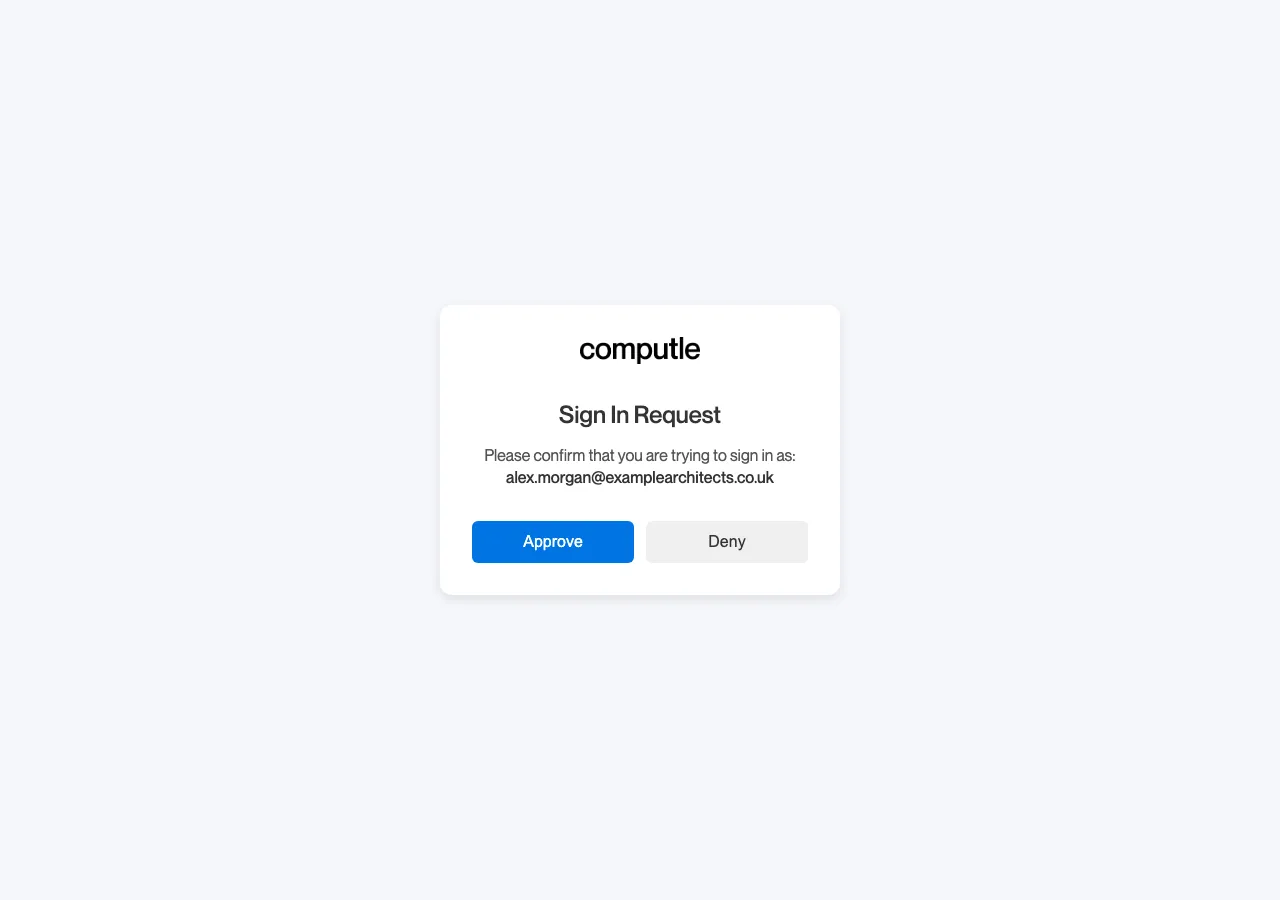
Click Approve to confirm it is you signing in.
This page shows the Computle logo. If you did not start this sign-in, click Deny.
-
Go back to the page where you started.
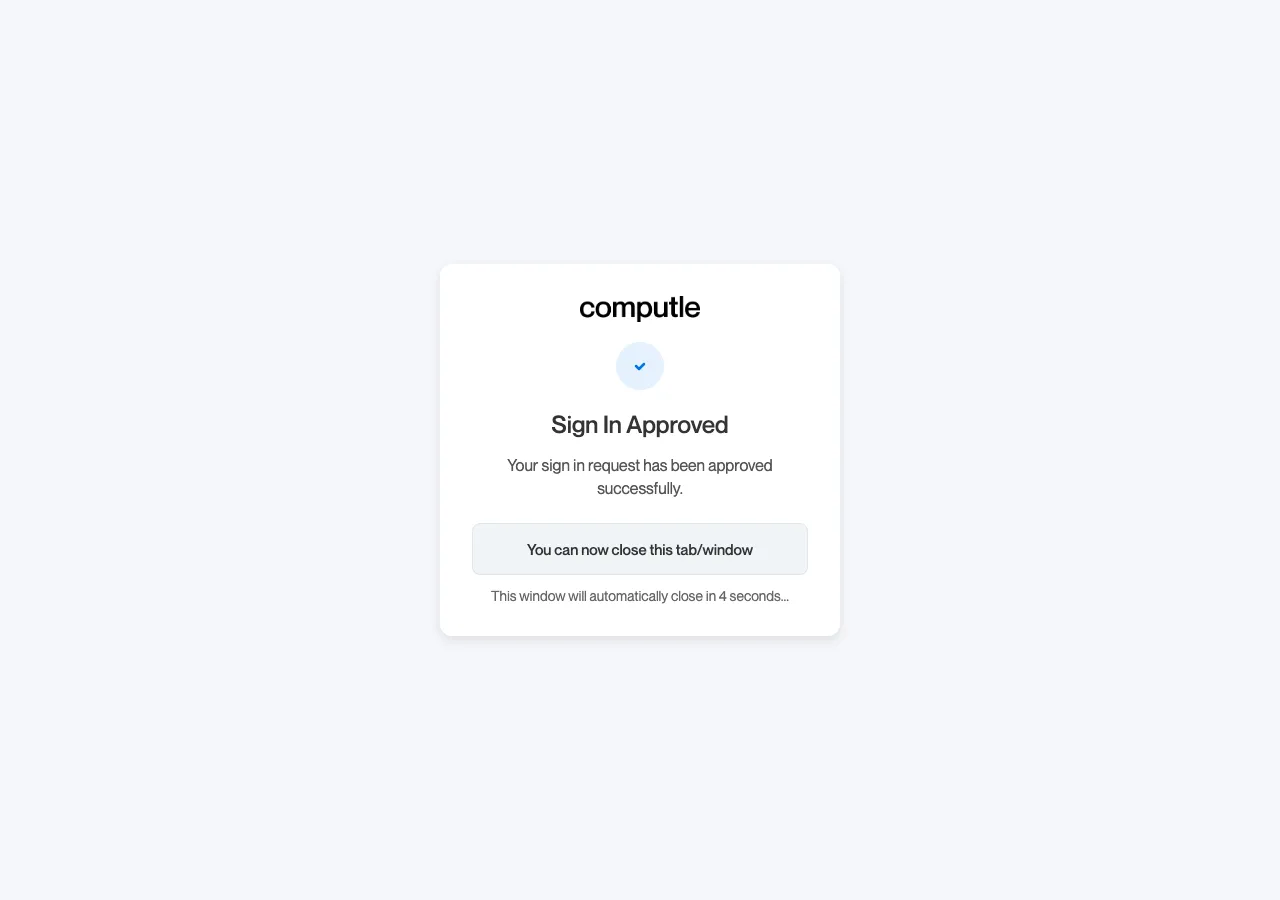
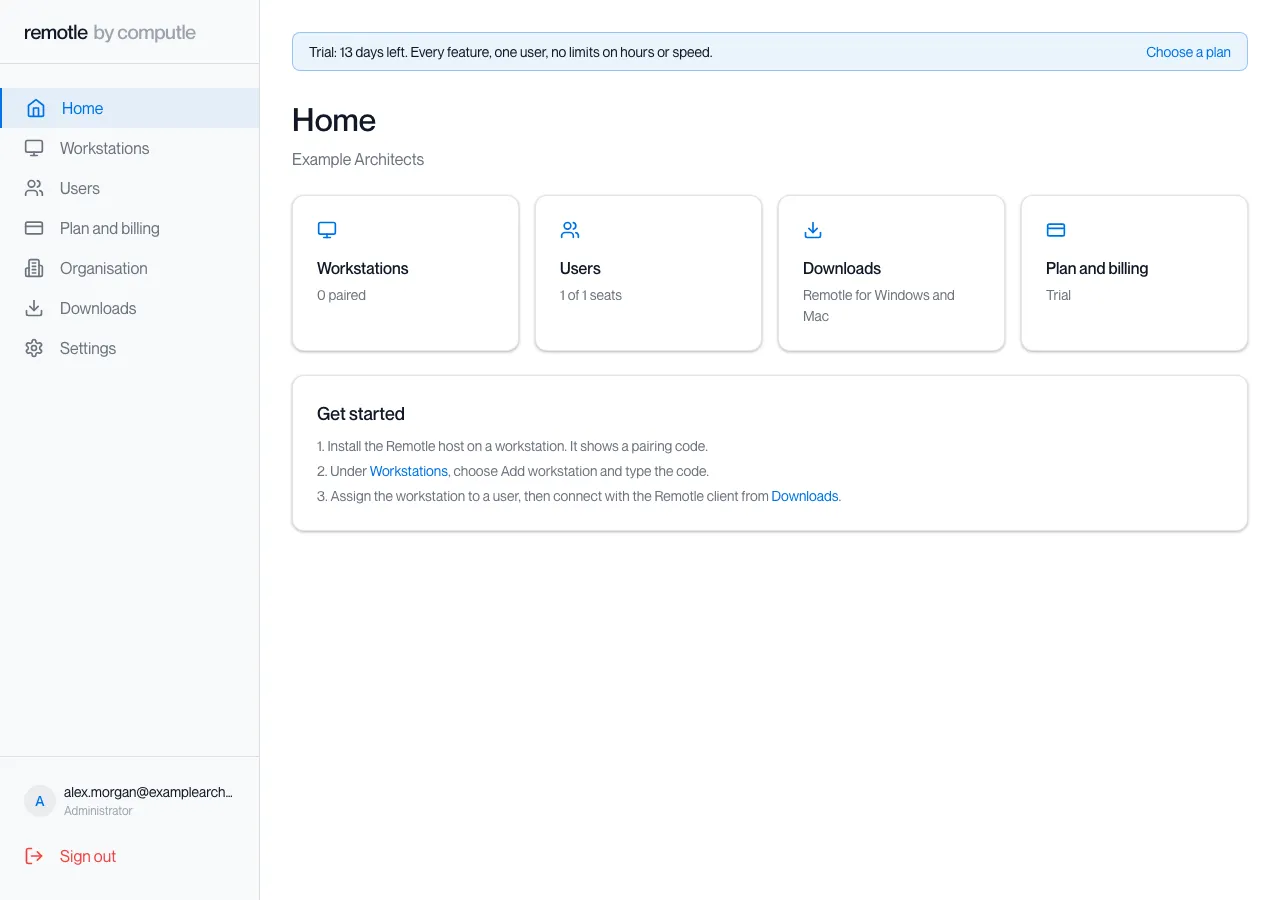
The approval page closes by itself. The page where you started opens the portal on Home.
Add a workstation
Section titled “Add a workstation”-
Install the Remotle host on the workstation.
See Installing the Host. The host’s About page shows an eight-character pairing code. Each code lasts ten minutes.
-
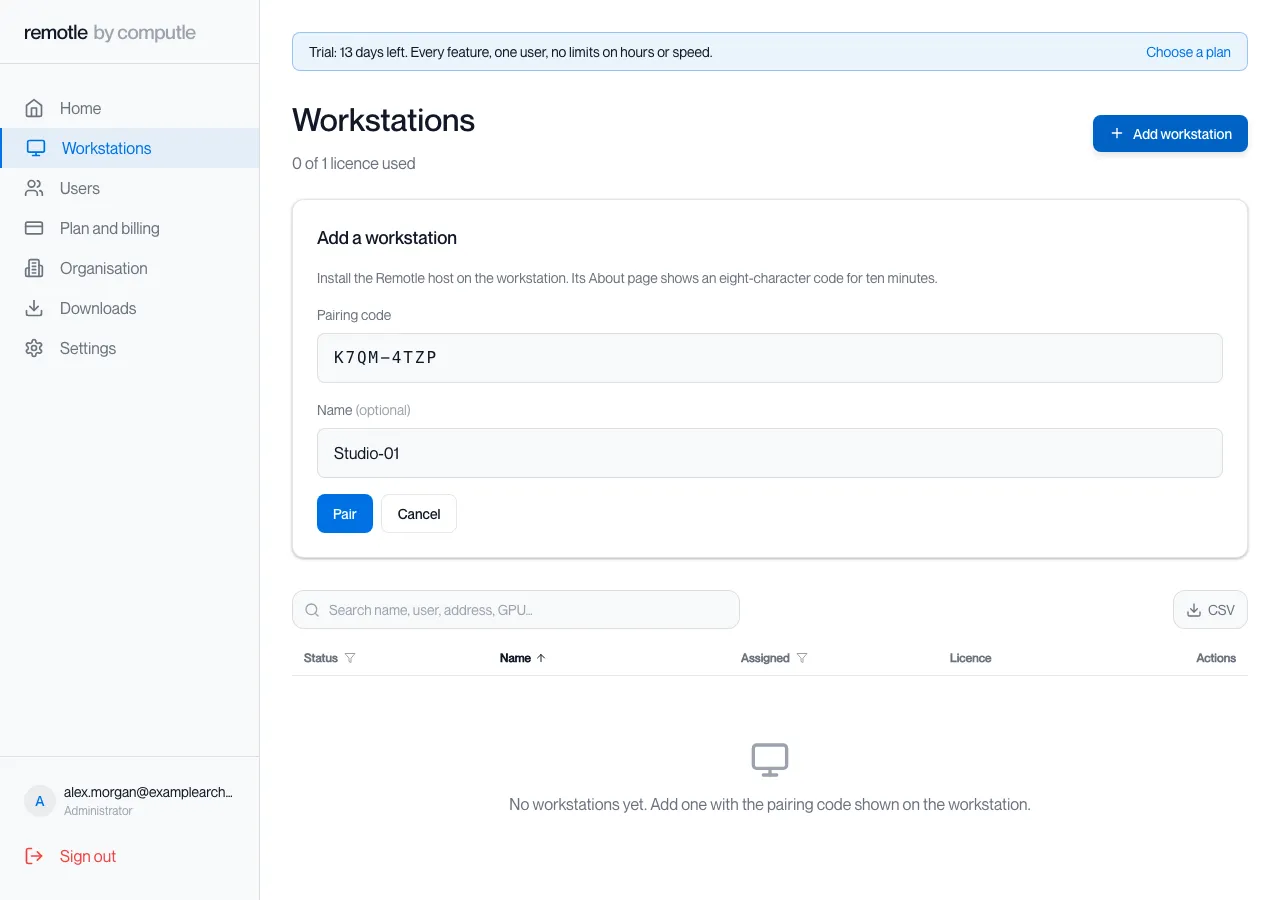
In the portal, click Workstations, then Add workstation.
-
Type the pairing code, and a name for the workstation if you want one, then click Pair.
If the portal says
That code was not found. Check it on the workstation and try again; codes last ten minutes., check the code on the workstation. If it has changed, type the new one.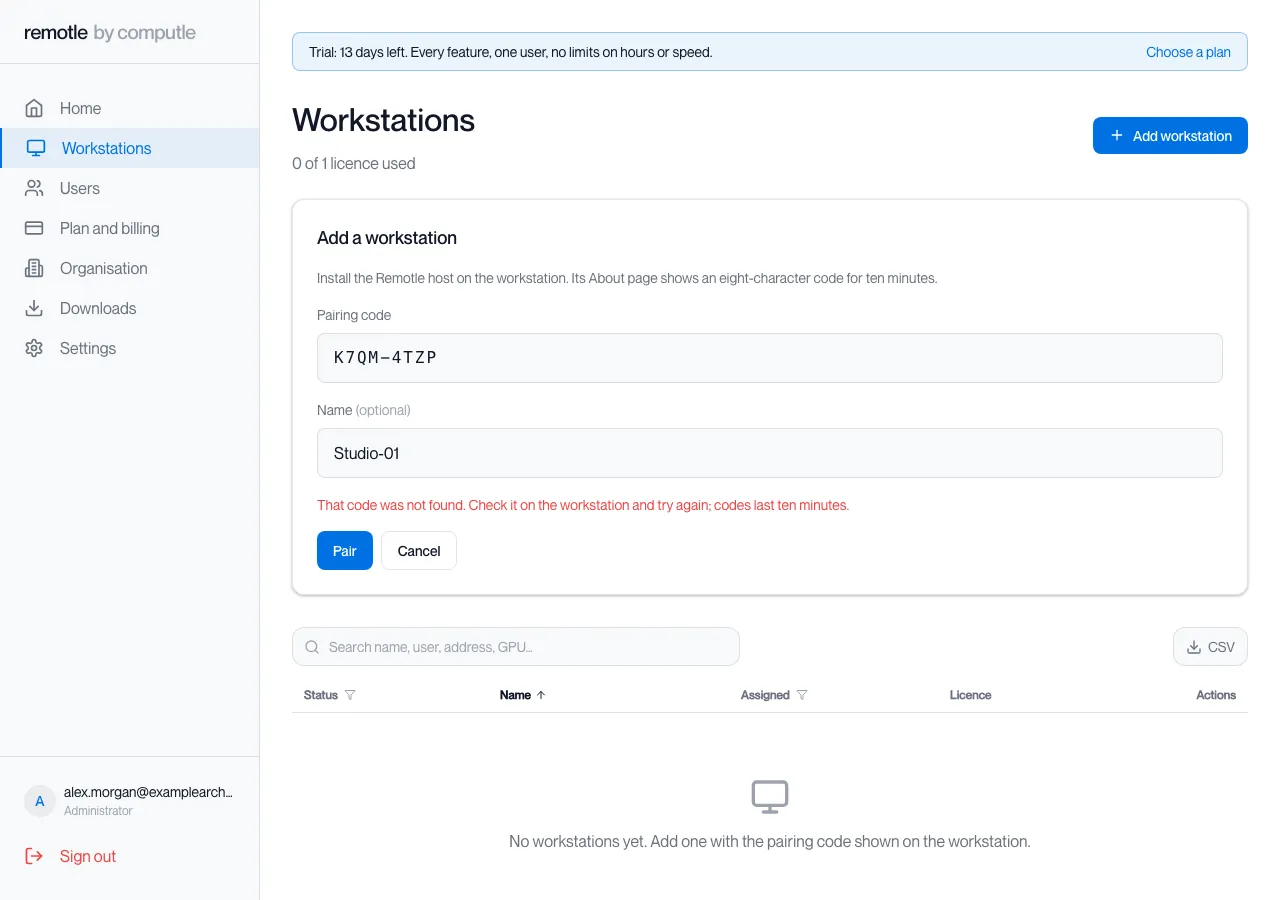
License and assign the workstation
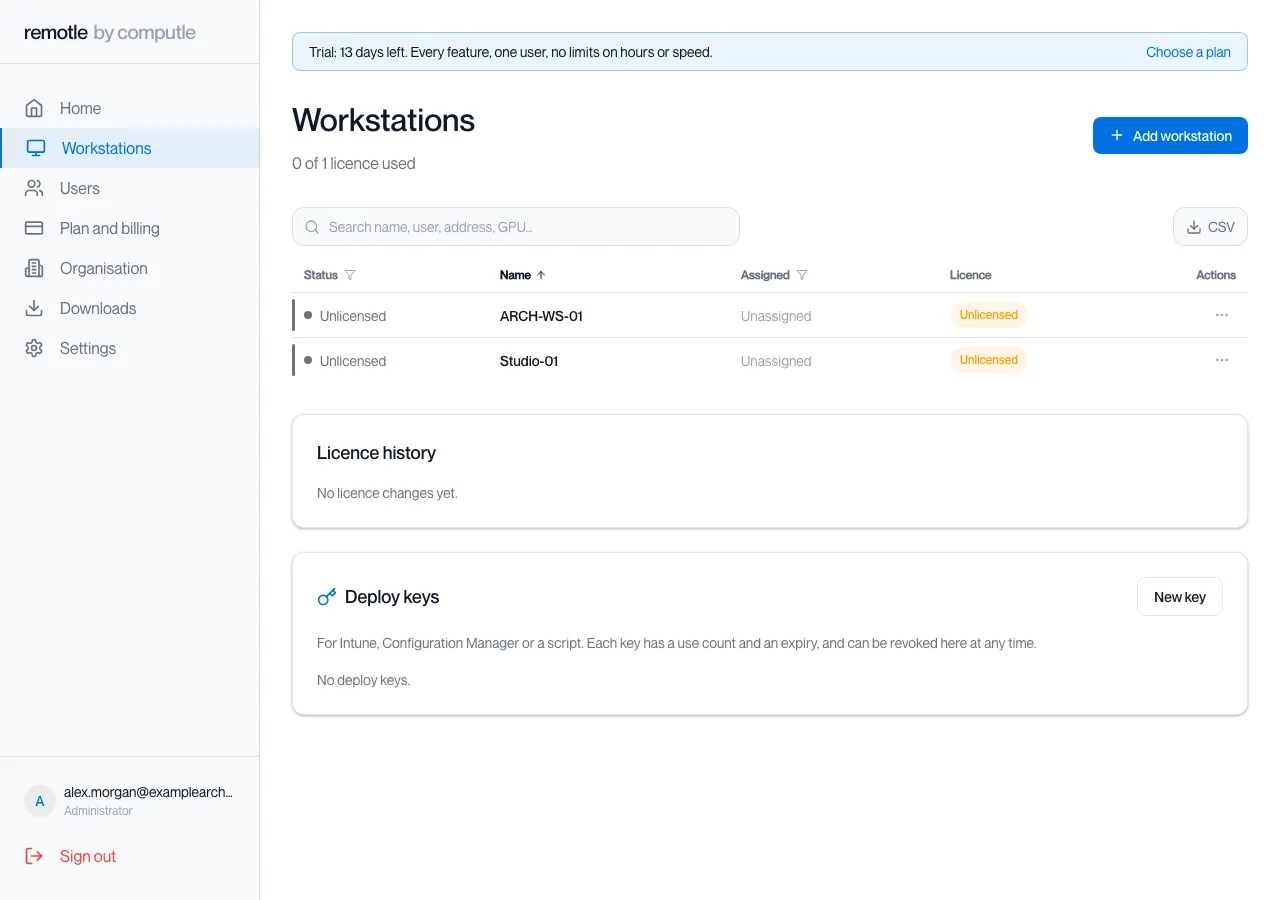
Section titled “License and assign the workstation”A workstation needs a licence before anyone can connect to it. The top of the Workstations page shows how many licences are in use.
-
Find the workstation in the list. A new workstation shows Unlicensed.
-
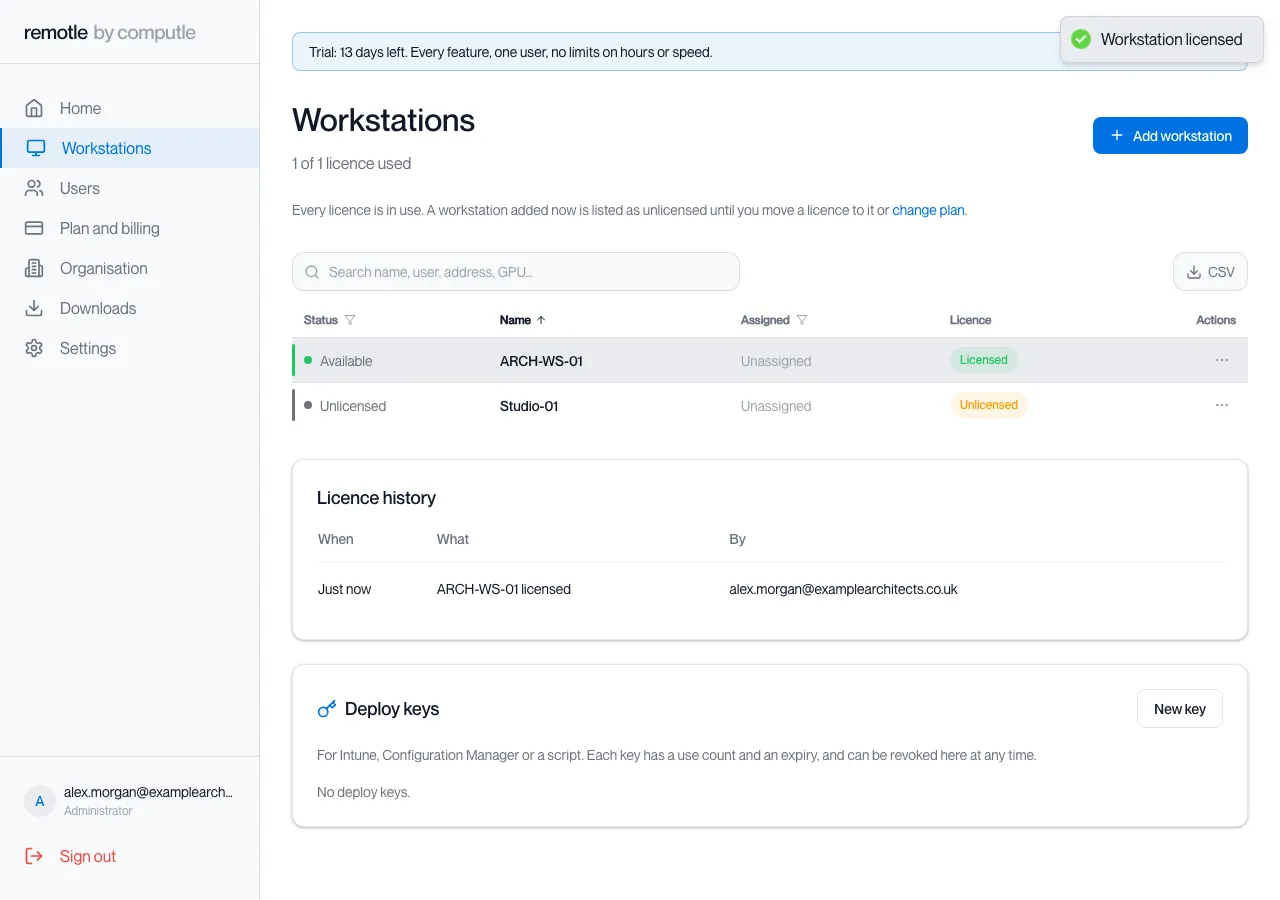
Click … in the Actions column on its row, then click License.
The workstation shows Licensed and the Licence history records the change.
-
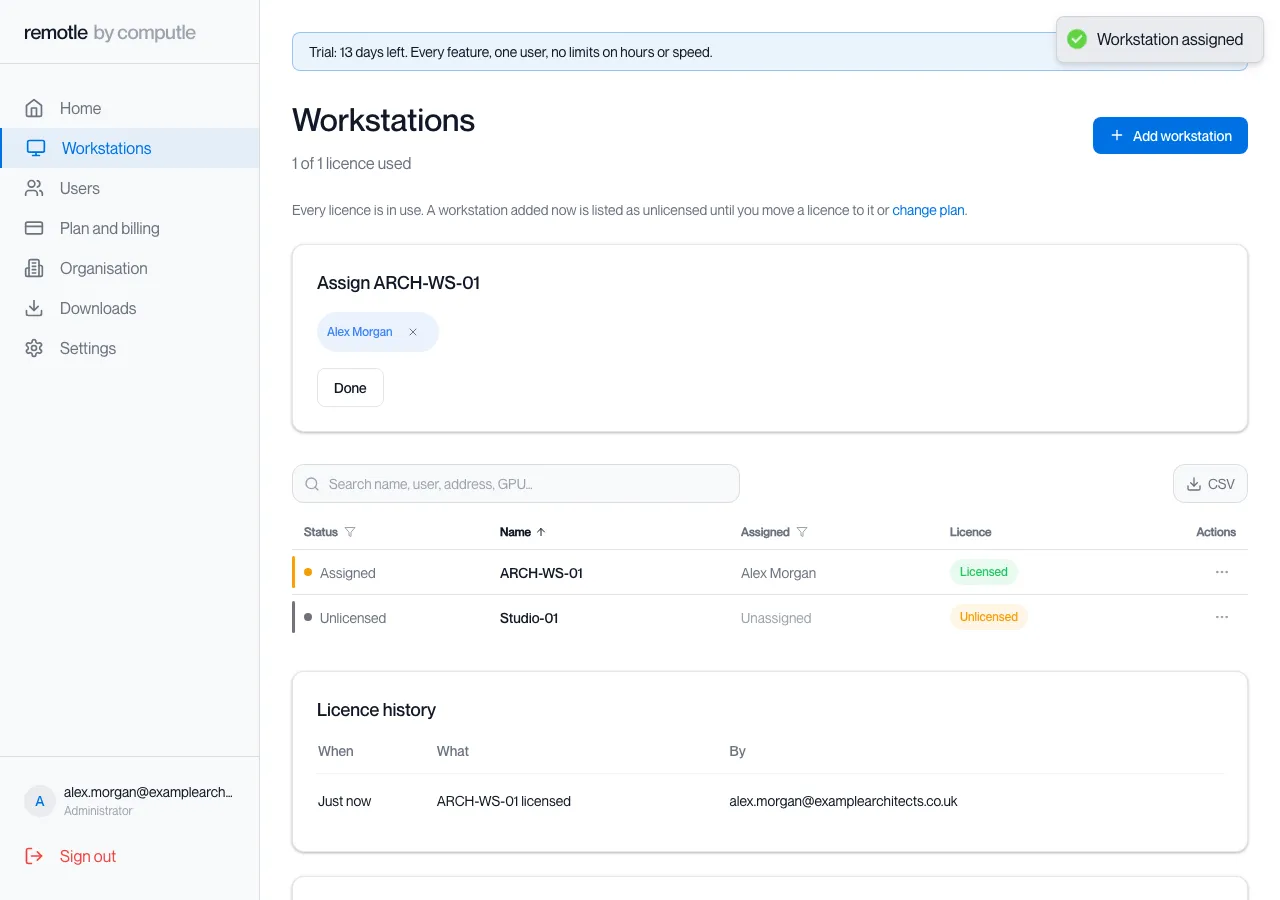
Click … on its row again, then click Assign, and choose the person in the Assign panel above the list. Click Done.
The workstation shows Assigned and the person’s name.
Move a licence to another workstation
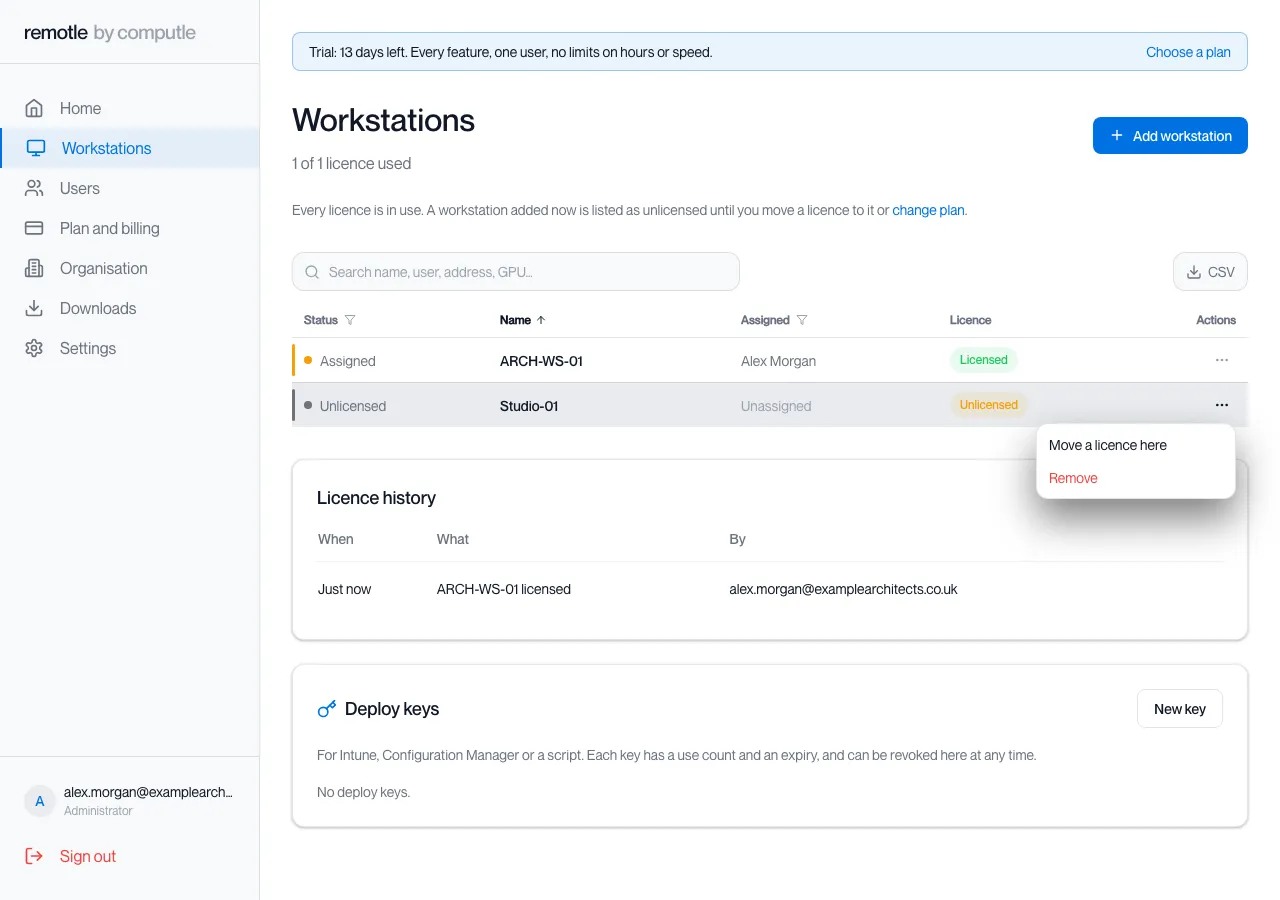
Section titled “Move a licence to another workstation”When every licence is in use, a workstation you add is listed as unlicensed. Move a licence to it, or change your plan for more licences.
-
Click … on the unlicensed workstation’s row, then click Move a licence here.
-
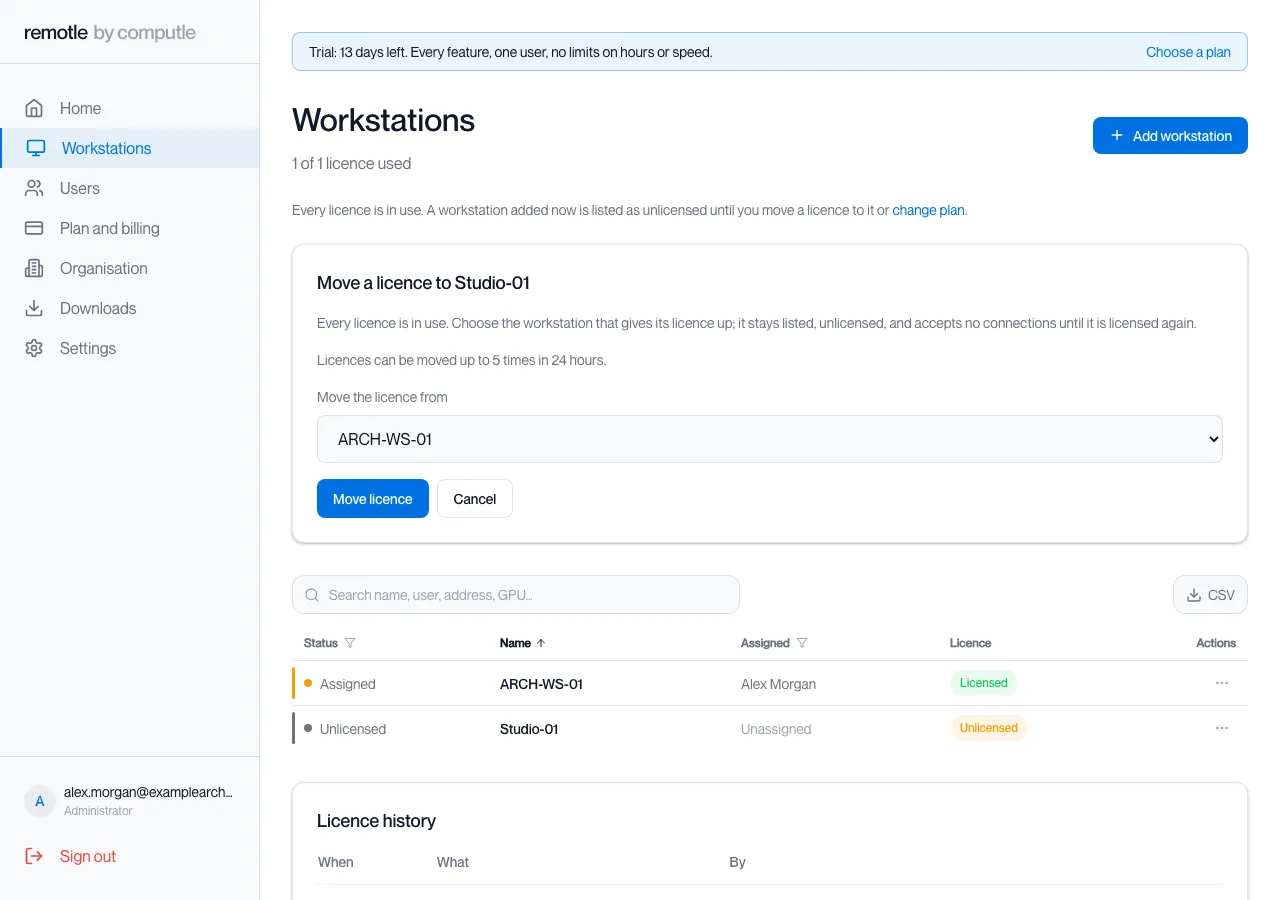
Choose the workstation that gives its licence up, then click Move licence.
The workstation that gives its licence up stays in the list, unlicensed, and accepts no connections until it is licensed again. Licences can be moved up to 5 times in 24 hours.
Connect
Section titled “Connect”-
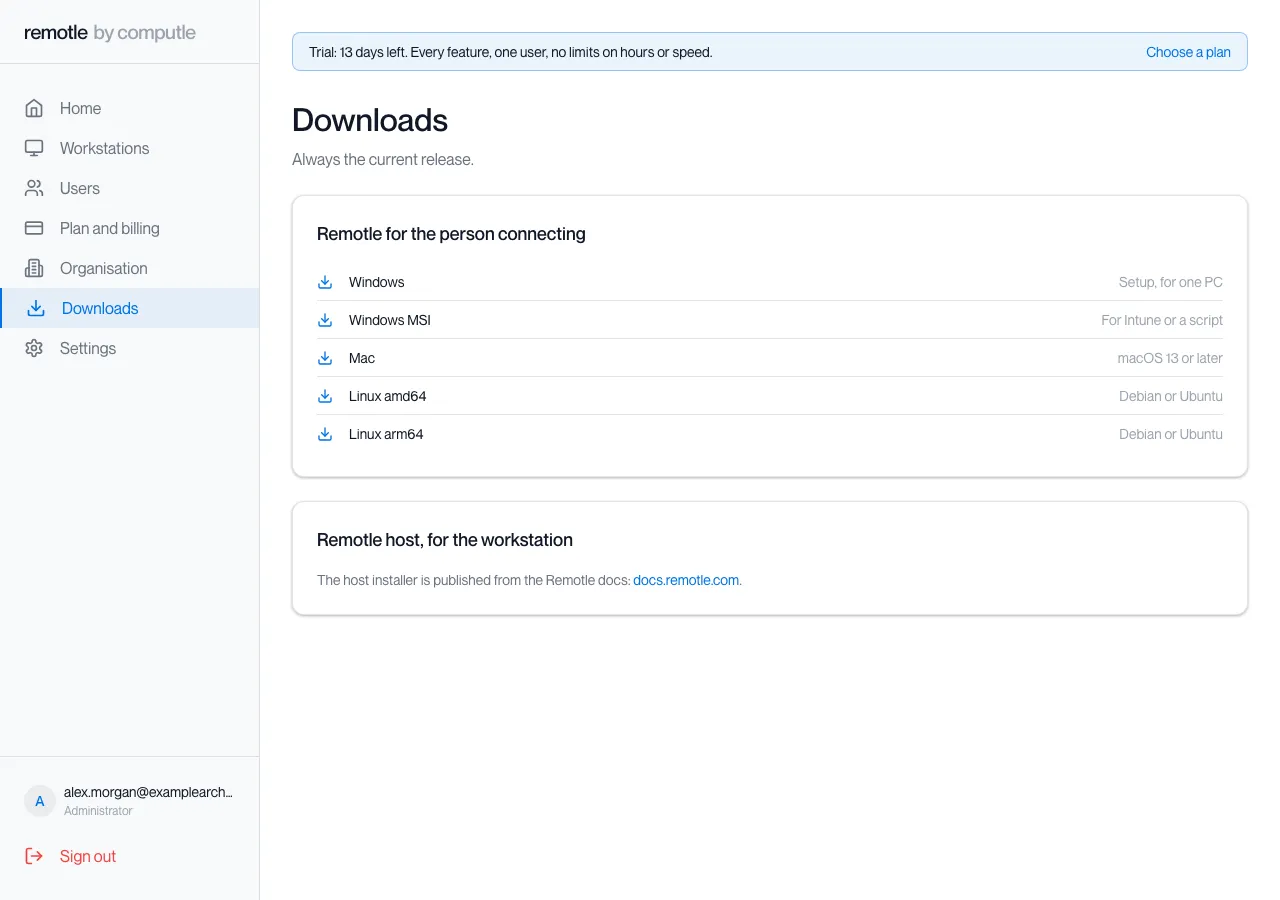
In the portal, click Downloads and install Remotle on the device you connect from.
-
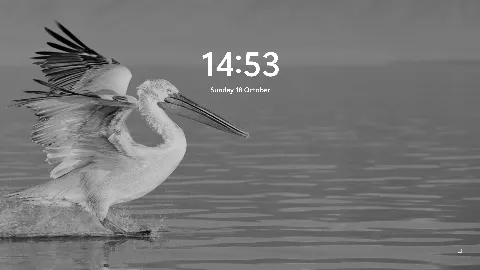
Open Remotle, sign in, and click Connect on your workstation.
See Sign In and Connect.
The rest of the portal
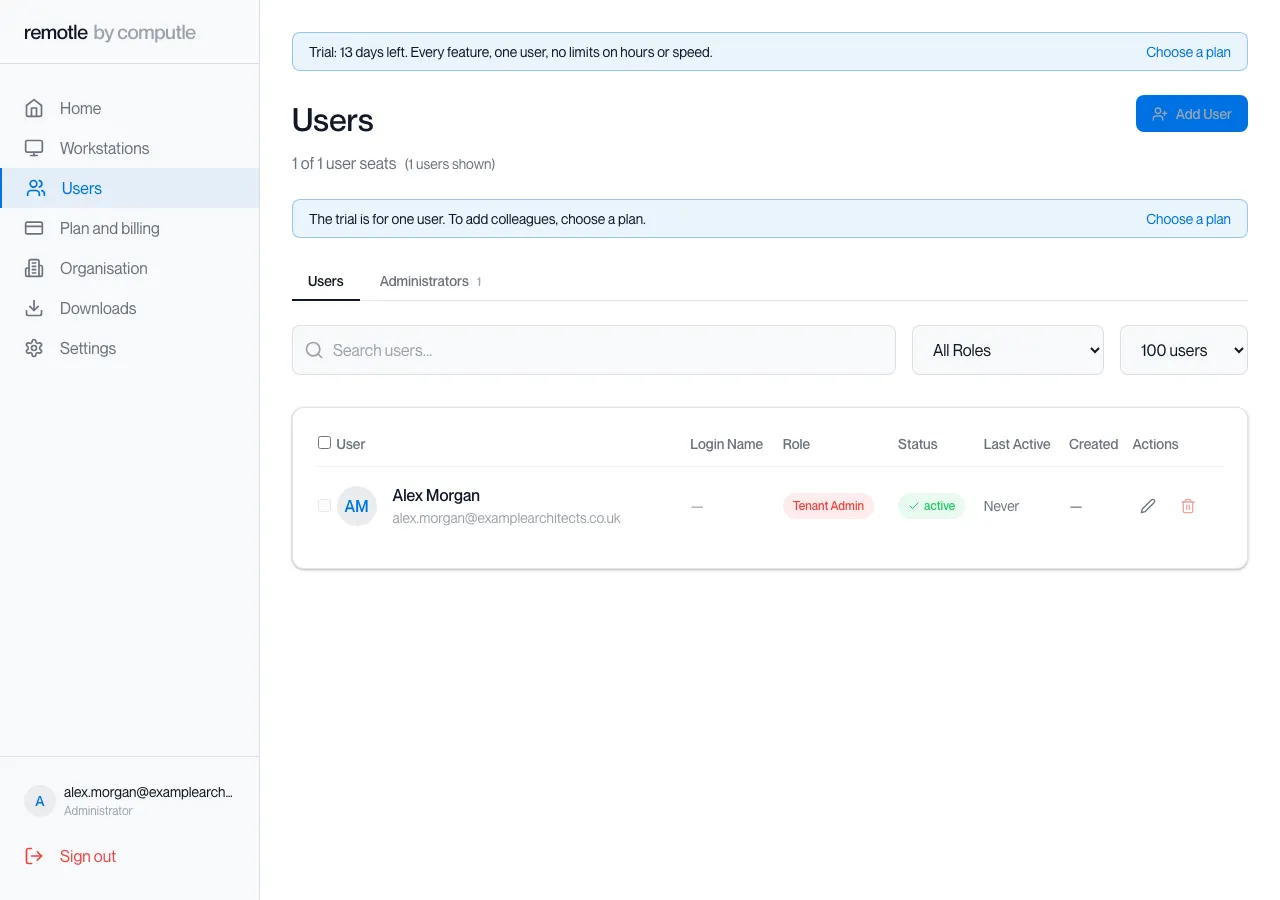
Section titled “The rest of the portal”Users lists everyone in your organisation and their roles. The trial is for one user. To add colleagues, choose a plan.
Plan and billing
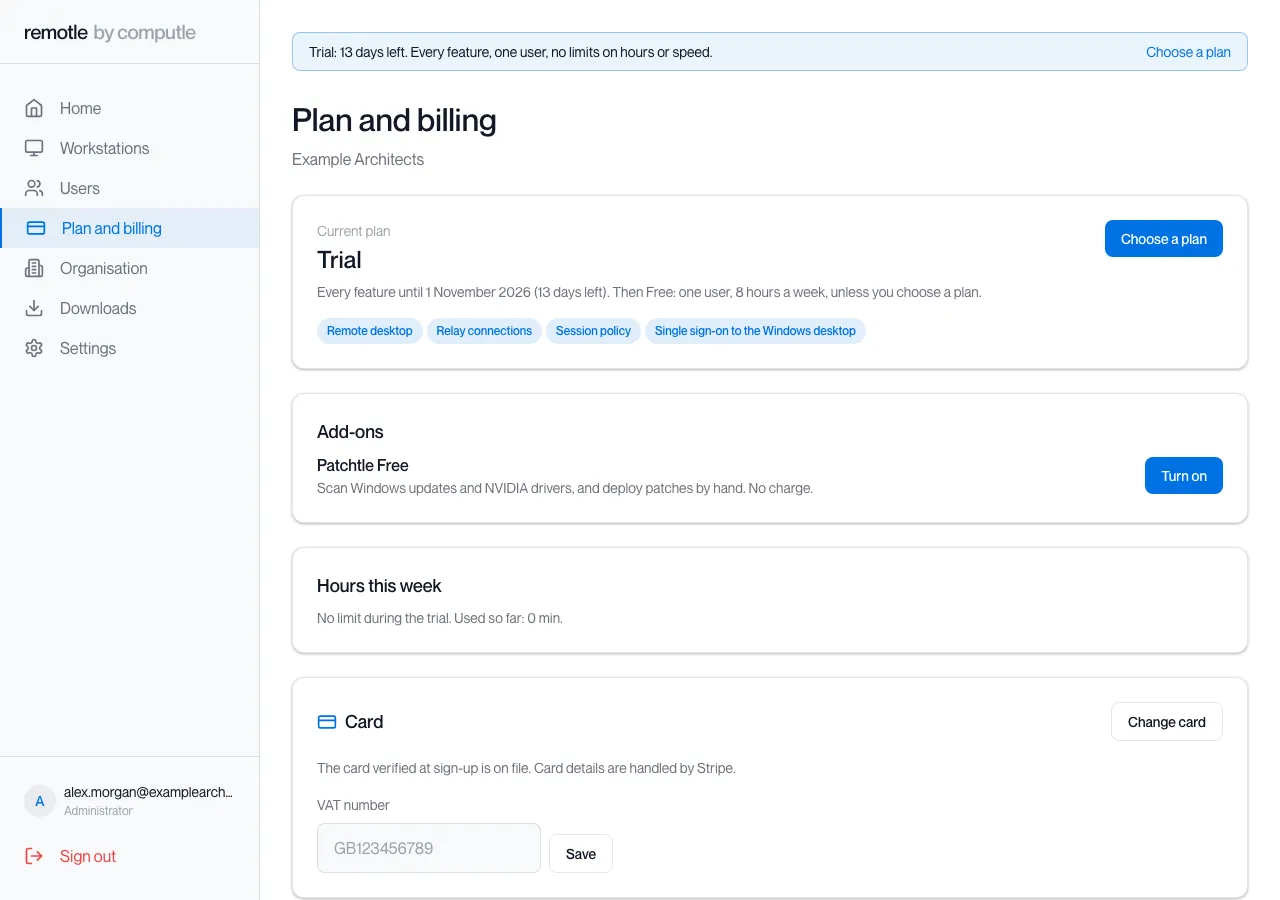
Section titled “Plan and billing”Plan and billing shows your current plan, the features it includes, the hours used this week, the card on file and your invoices. Click Choose a plan to change plan. You can add a VAT number here.
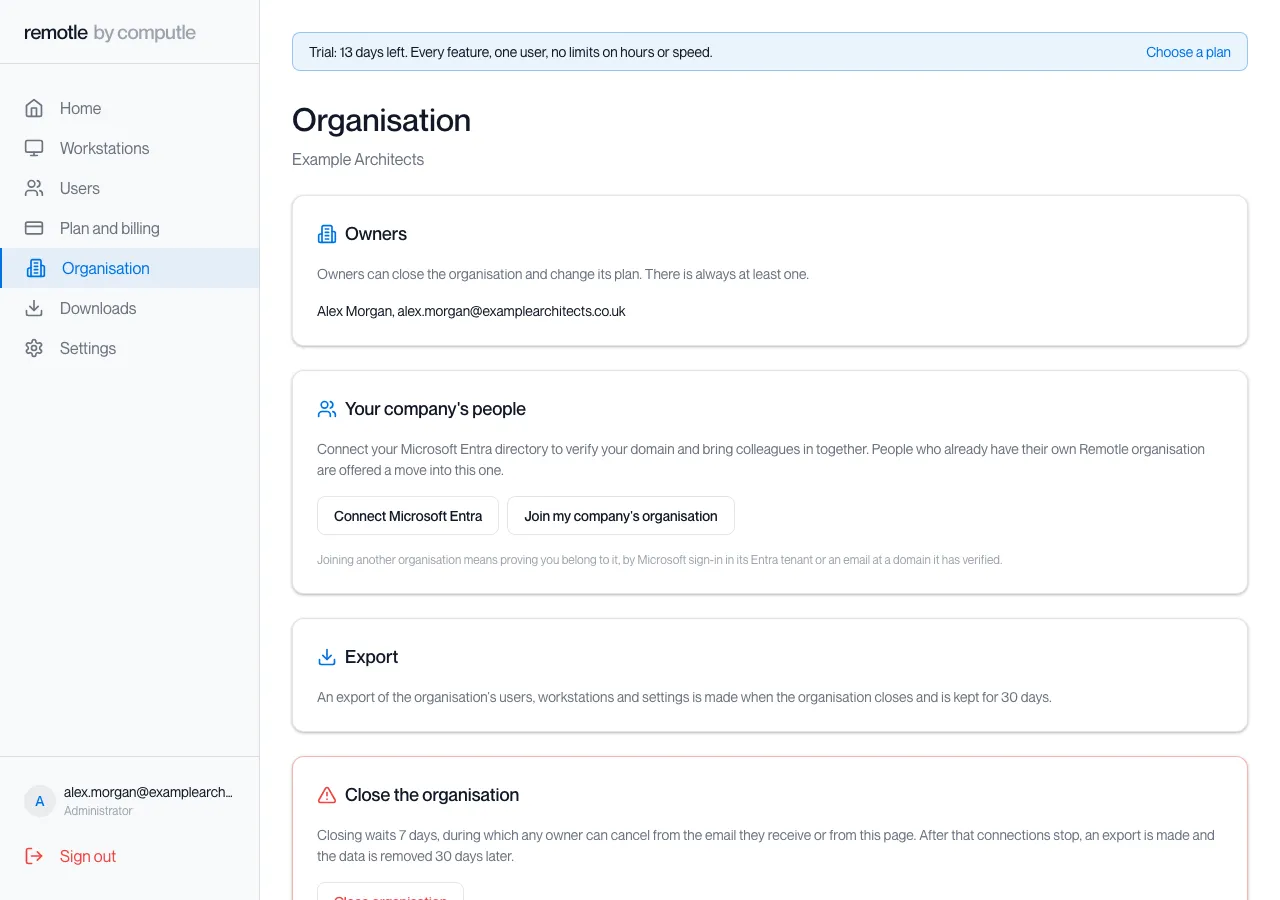
Organisation
Section titled “Organisation”Organisation lists the owners. Owners can close the organisation and change its plan, and there is always at least one. Here you can also connect your Microsoft Entra directory to verify your domain and bring colleagues in together, or join your company’s existing Remotle organisation.
Close the organisation is at the bottom of the page. Closing does not happen straight away: any owner can cancel it from the email they receive or from this page, and the page says how long that lasts. For what happens to your data afterwards, see remotle.com/privacy.